
Local Model Deployment#
Congratulations, if you were able to create both models!
If not, don’t worry - sample ones are provided with the repository.
In this part we will follow Test-Driven Development (TDD) approach: https://en.wikipedia.org/wiki/Test-driven_development. With TDD the tests are developed in the first place and due to the lack of code fail. The code needed to pass the tests is implemented successively until all tests are passing. The advantage of this approach is more compact and modular code, which is protected from regressions due to future changes. We provide a project covered 100% by unit and integration tests with missing implementation. The main objective of this exercise is to implement the missing code so that all tests are passed.
The model will be encapsulated in a docker container exposing a single rest endpoint predict.
We used FastAPI framework for REST API development along with uvicorn as an HTTP server.
Project Architecture#
The architecture for the local deployment is given below.
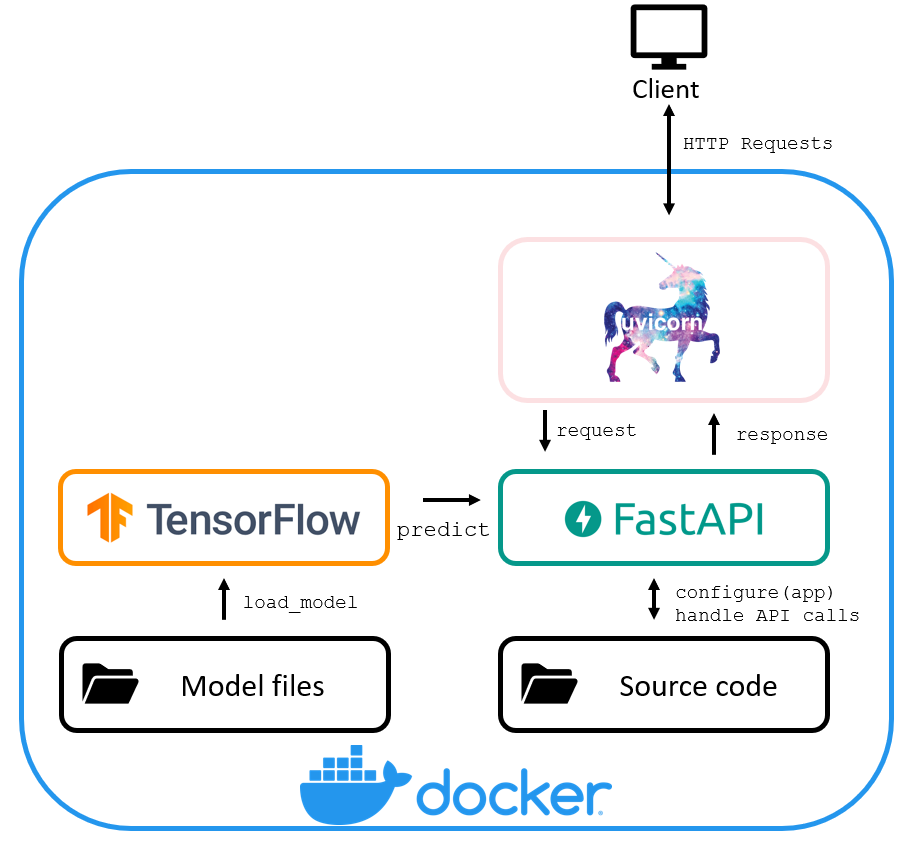
The API and models are enclosed in a Docker container providing an OS isolation.
The necessary packages are installed while building a Docker image. In particular Tensorflow loads and executes a model, FastAPI implements the desired API functionalities, and uvicorn is a server handling HTTP requests.
Project Structure#
The API has the following structure (__init__.py files and tests folder structure are omitted for the sake of clarity).
+ web
  + api
    + route_predictions.py
  + core
    + config.py
    + configure_app.py
  + model
    + model_loader.py
    + predictor.py
  + schemas
    + prediction_schema.py
  + tests
  + views
    + home.py
    + home.html
  main.py
  requirements.txt
  requirements_macos_m1.txt
The API is structured in order to allow for future extensions, e.g., adding more endpoints and subsequently schemas (in the interest of avoiding confusion with prediction models, this term is used instead of typical models for REST APIs; cf. Model View Controller).
The code is documented with a docstring for each function; due to limited amount of code modules are not documented.
There is a unit and integration test suite covering the public API. The loading of a tensorflow model is mocked and the main.py script is not covered.
Error handling is carried out by means of HTTP error codes. Following the FastAPI convention, an application/json message is returned with each custom error.
Instructions#
Open your preferred IDE and select already created virtual environment (
Preferences -> Python Interpreter -> Add Interpreter). In PyCharm the setting looks like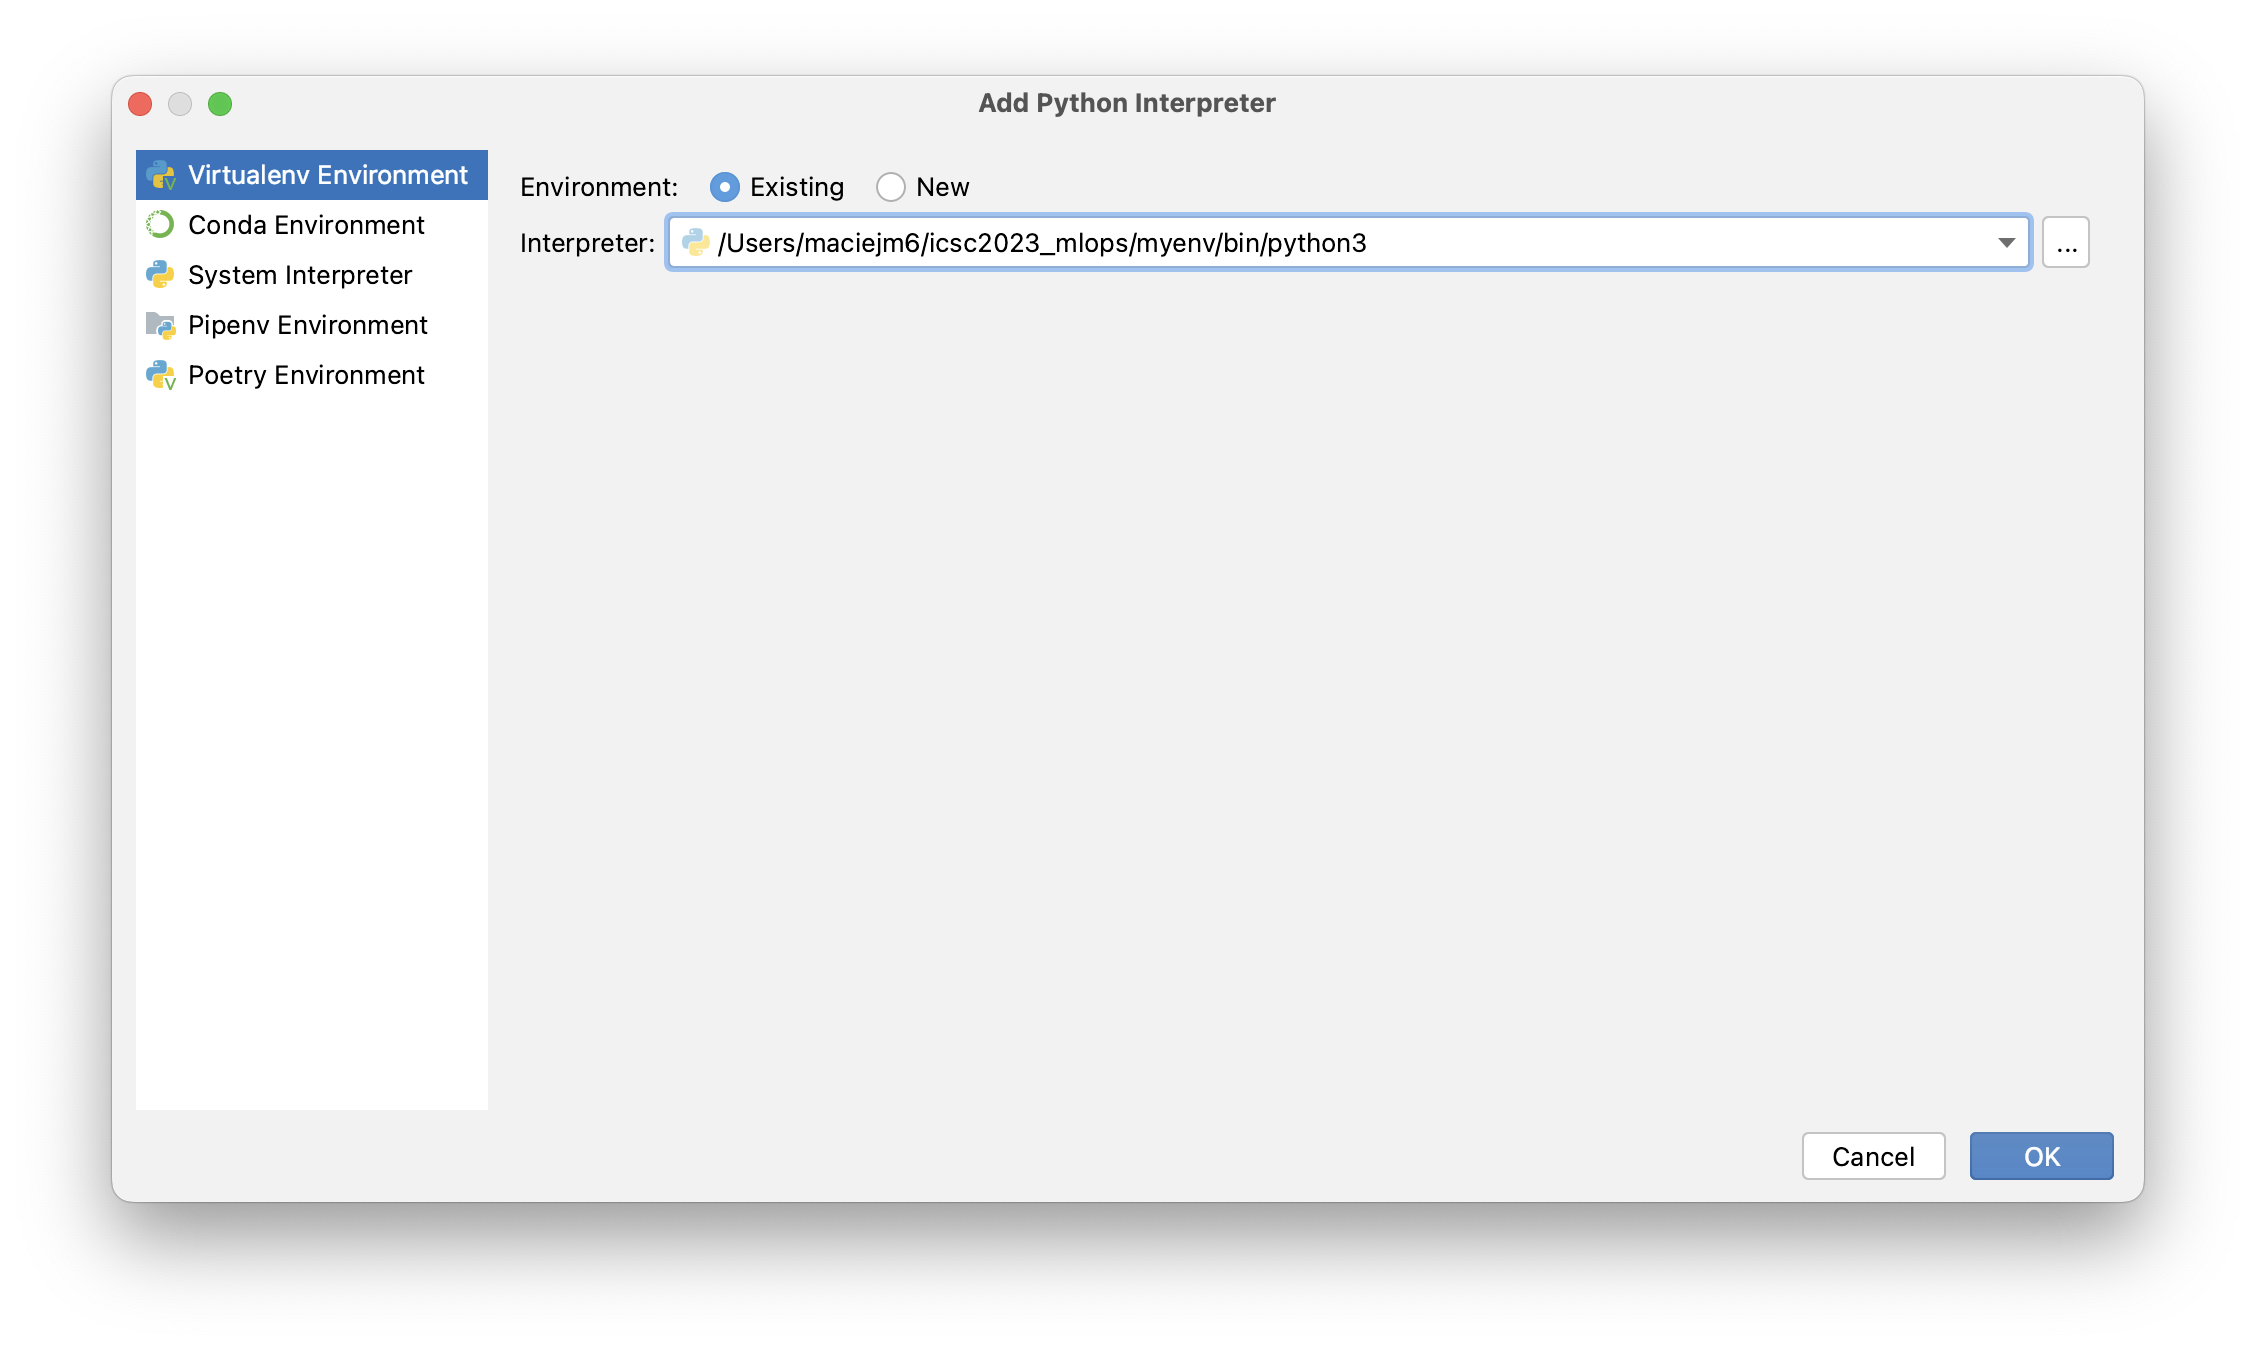
Right click on the
testsand selectRun 'pytest in tests'. Most tests should failPlease proceed with implementation as follows:
model/model_loader.pydef parse_model_id(...)- extract model id from its output folder namedef load_model(...)- load model withtensorflowfrom a given pathdef load_models(...)- iterate overmodelsdirectory and load all models into a dictionary mappingmodel_idinto loaded modeldef get_model(...)- get model for amodel_iddef get_latest_model(...)- get latest model
model/predictor.pydef predict_sentiment(...)- predict sentiment as float from a reviewdef convert_probability_to_sentiment(...)- convert float output to string
api/route_predictions.pydef get_prediction_with_id(...)- load models and run prediction for an input review; handle inconsistent request (model id and review) with HTTP errorsdef get_prediction_with_id(...)- load latest model and run prediction for an input review; handle inconsistent request (review) with HTTP error
Once all tests are passed, we are ready for a local deployment.
To this end, execute the main.py file. This results in opening the browser.
If we would like now to share the model, our users would need to install a lot of software as given in prerequisites, which is impractical; not to mention the relevant IT knowledge. Therefore, in the following we will package our model into a docker container.
Docker Image#
The first element is the Dockerfile file for the api. The goal of this file is to install all dependencies needed for execution.
This approach not only isolates model execution environment from a running OS but also ensure reproducibility of results by locking package versions and the versioning of a docker image itself.
The docker file content is given below along with relevant comments
FROM python:3.9

# Set the current working directory to /code
WORKDIR /code

# Copy requirements first and install in order to cache packages with Docker layers
COPY web/requirements.txt /code/requirements.txt
RUN pip install --no-cache-dir --upgrade -r /code/requirements.txt

# Set environmental variables for the web
ENV MODEL_ROOT "/code/models"
ENV CODE_ROOT /code/web
ENV PYTHONPATH "${PYTHONPATH}:${CODE_ROOT}"

# Copy models and web as these may change frequently
COPY notebook/models ${MODEL_ROOT}
COPY ./web ${CODE_ROOT}
The second element is a docker-compose-notebook.yaml file. This file executes the container above with a command setting port for connection.
Docker compose file allows for embedding
version: "3.9"

services:
  api:
    build: .
    command: uvicorn app.main:app --host 0.0.0.0 --port 8080
    ports:
      - 8080:8080
To build the model, please execute:
docker compose build
To run, execute
docker compose up
In order to execute a model REST API call one may use one of three approaches ():
open python interpreter,
import requests
params = {'review': 'It was a good movie!!!'}
response = requests.get("http://0.0.0.0:8080/1/", params=params)
print('First model', response.json())
open preferred browser and navigate to
0.0.0.0:8080for more information on how to execute commands. E.g.,
'http://0.0.0.0:8080/It%20was%20a%20good%20movie'open a command line interface (for Windows, a UNIX shell is required) and run a
curlcommand, e.g.,
curl -X 'GET' \
'http://localhost/It%20was%20a%20good%20movie' \
-H 'accept: application/json'